
GPT Image 2.5 Prompt Guide: Flare vs Sunburst & Edits
Compare GPT Image 2.5 Flare vs Sunburst, write checkable prompt specs, stop inpainting drift in local edits, and avoid API billing traps on Pixapi.
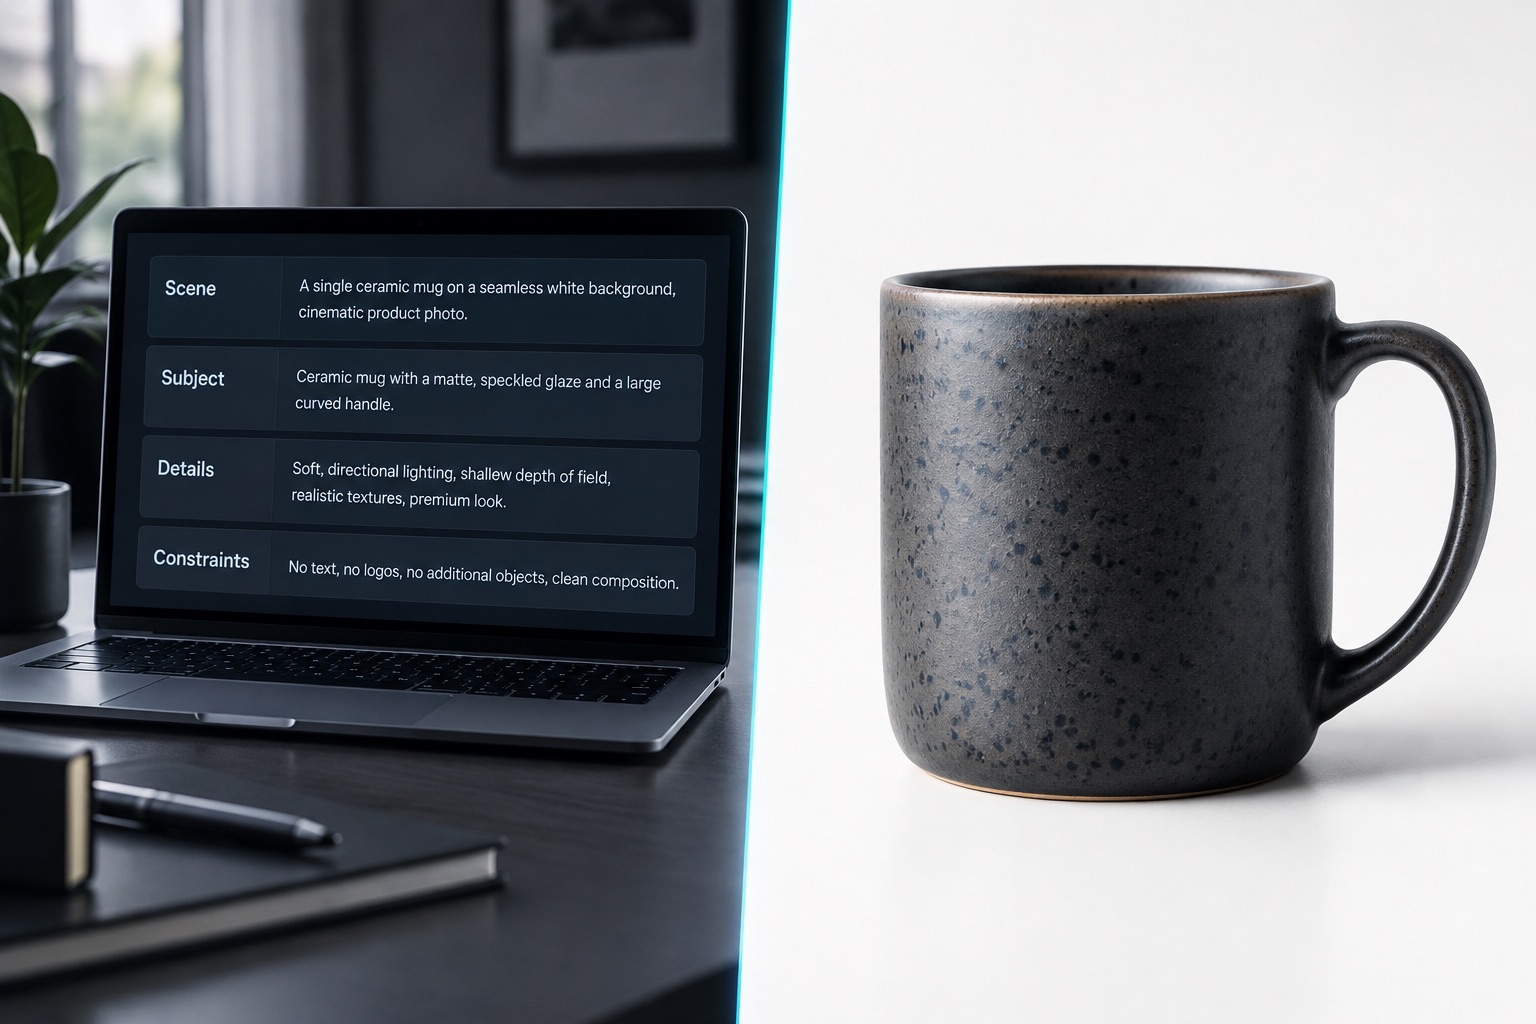
Developers building production image pipelines face two perpetual headaches: first, prompts packed with fluffy adjectives like "8K, cinematic lighting, masterpiece" that still produce wildly unpredictable coin tosses; second, localized edits where asking to swap a jacket causes the model to regenerate the person's face, hair, and sun angle.
The real breakthrough with GPT Image 2.5 is shifting from wishful thinking to writing testable visual specifications: decouple subjects, compositions, lighting, and negative constraints, then tweak one variable at a time so your output can actually be regression-tested.
OpenAI split 2.5 into two distinct engines: the high-speed lightweight gpt-image-2.5-flare, and the heavy-duty foundation model gpt-image-2.5-sunburst. Both are fully wired into Pixapi via unified OpenAI-compatible endpoints. You can test your prompt specs in the browser with the GPT Image 2.5 Image Generator at a flat 2 credits per shot, then copy the exact same parameters straight into your backend code.
No theoretical fluff here—just actionable engineering takeaways: how to pick the right engine, how to write prompts that do not drift, and how to avoid surprise API bills.
Flare vs Sunburst: Image Quality, Latency, and Cost-Per-Accepted-Image
| Evaluation Metric | Flare (gpt-image-2.5-flare) | Sunburst (gpt-image-2.5-sunburst) |
|---|---|---|
| Role | Speed-first, low-latency workhorse | Quality-first, heavy-duty foundation engine |
| Quality Baseline | Roughly on par with GPT Image 2 | Noticeably superior to GPT Image 2 |
| Best Suited For | Bulk runs, multi-angle SKU variants, quick drafts | Typography posters, infographics, portraits, fine edits |
| Pixapi Endpoint | Unified image endpoint | Unified image endpoint |
| API Starting Price | 1 credit (1K / low tier) | 1 credit (1K / low tier) |
Here is a pragmatic evaluation rubric for your team:
- Existing GPT Image 2 outputs already pass QA: Try Flare first. Keep your prompts, reference images, and resolutions identical, then benchmark latency. If your pass rate does not drop, you get substantially faster first-byte responses for free.
- Plagued by messy typography, deformed hands, or drastic edit drift: Go straight to Sunburst to set a reliable quality baseline. If Sunburst cannot clear your bar, your prompt specification is likely too ambiguous. Once Sunburst passes consistently, test Flare against that exact prompt to see if the lighter engine can handle it.
- Calculate your Qualified Cost per Image: Flare is quick, but if you have to regenerate three times to get one usable asset, your net cost and user latency are worse than running Sunburst once. Factor retry rates, manual QA, and drop-offs into your true pipeline ledger.
A crucial gotcha: even when passing quality: "high" to both models, Sunburst delivers deeper texture detail and takes noticeably more compute time than Flare. When running bake-offs, always enforce single-variable testing—change only the model key, leaving size and quality untouched. If your artwork contains dense or small typography, start at medium or high.
6 Engineering Prompt Rules: Turn Vague Ideas into Checkable Specs
Reliable prompts look like structured config files, not poetic essays. The official guide distills down to six operational rules:
1. Name the deliverable before you talk about aesthetics.
Writing "a luxurious cosmetic product photo" gives the model zero checkable criteria. Write an explicit specification: "E-commerce white-background still life, matte glass serum bottle centered, 45-degree overhead angle, soft diffused light, clean contact shadows." QA only needs to verify three things: pure white backdrop, correct perspective, no messy shadow artifacts.
2. Structure prompts in distinct blocks like JSON.
Do not pack dozens of conditions into a single runaway paragraph. Break them down: [Scene] for environment and illumination, [Subject] for identity and posture, [Details] for materials and props, [Constraints] for forbidden elements. Segmented prompts are trivial to debug, modify, and template in code.
3. Use verifiable physical cues, not generic buzzwords.
Trash phrases like "hyperrealistic 8K photorealism." Replace them with observable physical attributes: "visible facial skin texture, natural side-window lighting, shallow depth of field, 85mm portrait lens perspective." Giving the model physical reference frames beats keyword stuffing every time.
4. Put on-image copy in quotes and declare exact frequency.
Whenever you need text rendered on canvas, wrap it in double quotes and explicitly state: "rendered exactly once, zero additional text anywhere else." Whether you are building social ads, packaging mockups, or UI screens, human eyes must verify spelling before production. Models do not take the blame for printed typos.
5. For inpainting and edits, list changes AND a freeze list.
Simply asking to "change the jacket to a red leather coat" frequently causes the model to regenerate the subject's face, hair color, and background setting. The robust pattern: "Change only the upper garment to a red leather coat; strictly preserve facial features, hairstyle, body posture, street background, and existing lighting direction." When passing multiple reference images, assign clear roles: image 1 is the base canvas, image 2 is the source object, image 3 is material reference.
6. Change one variable per iteration.
Do not attempt to swap the background, scale the actor, dim the ambient light, and add sunglasses in a single edit call. Progress one change at a time, feeding the accepted image from turn N into turn N+1. If your business logic demands 100% pixel-identical lock on specific regions, do not expect raw text prompts to act as a stencil—composite the newly generated patch back onto the original asset using traditional code-level alpha masks.
A battle-tested production prompt skeleton:
[Task] Generate / Edit a <deliverable type>
[Subject] Subject appearance, pose, gaze direction, critical features
[Style] Material finish, ambient light, color temperature, lens look
[Text] Rendered exactly once: "<verbatim copy>"
[Constraints] Modify only ...; strictly preserve ...; forbid extra copy, watermarks, fake alpha checkerboards
4 Key Production Workflows: Typography, Infographics, and Consistency
These four scenarios represent the most common calls passing through Pixapi:
- Commercial creatives with typography: Pin brand names, taglines, and discount numbers to explicit positions and counts, while strictly disallowing random logos or watermarks. This remains the GPT Image family's strongest competitive edge.
- Infographics, flowcharts, and slide visuals: Treat arrows, diagram steps, and metric labels as layout placeholders. Visual elegance does not equal scientific correctness—arrow directions, chemical formulas, and funding figures must be audited by humans before publishing.
- Surgical edits and catalog cutouts: Model outfit changes, furniture swaps, and background cleanups. The shorter the prompt, the more defensive your freeze constraints must be. Check whether fingers, product contact shadows, and background edges held still.
- Multi-turn character and scene consistency: Generate a baseline anchor image first, then tweak the setting or props in subsequent turns. In turn two, restate: "same facial structure, same outfit features, same color palette." Never assume the model will guess your continuity requirements.
About transparent backgrounds: Pixapi supports clean alpha output. In your prompt, explicitly request "pure transparent background, clean alpha channel, strictly no faux gray-and-white checkerboard pattern." Verify the output in an image editor that checks real alpha channels, rather than trusting a browser thumbnail.
Running the API on Pixapi: Code Samples and Custom Sizes
Before wiring backend code, test your prompts in the GPT Image 2.5 Generator. The Lab supports both gpt-image-2.5-sunburst and gpt-image-2.5-flare at a flat 2 credits per run, making it cost-effective to tune your spec before committing to code.
Production calls use standard OpenAI-compatible endpoints:
1. Text-to-Image (POST /v1/images/generations)
curl -X POST https://api.pixapi.ai/v1/images/generations \
  -H "Authorization: Bearer $PIXAPI_API_KEY" \
  -H "Content-Type: application/json" \
  -d '{
    "model": "gpt-image-2.5-flare",
    "prompt": "[Scene] bright studio [Subject] matte glass serum bottle centered [Details] 45-degree overhead angle, soft lighting, bottle label text rendered once [Constraints] seamless white background, no watermarks",
    "size": "1024x1024",
    "quality": "low"
  }'
To maximize fidelity and crispness, switch model to gpt-image-2.5-sunburst and set quality to high.
2. Image Inpainting and Edits (POST /v1/images/edits)
curl -X POST https://api.pixapi.ai/v1/images/edits \
  -H "Authorization: Bearer $PIXAPI_API_KEY" \
  -H "Content-Type: application/json" \
  -d '{
    "model": "gpt-image-2.5-sunburst",
    "prompt": "Replace only the background with a minimalist wooden tabletop and gentle side lighting. Strictly preserve the original serum bottle geometry, label typography, camera angle, and shadow direction.",
    "image": "https://cdn.example.com/original-bottle.png",
    "size": "auto",
    "quality": "high"
  }'
For high-volume asynchronous jobs without blocking your server thread, dispatch to POST /v1/async/images/generations and POST /v1/async/images/edits, then poll for task completion. Full parameter definitions are documented in the GPT Image Guide, while dedicated reference sheets live on the Flare Docs and Sunburst Docs pages.
Custom dimensions carry strict bounds: both dimensions must be multiples of 16, the longest edge cannot exceed 3840, the aspect ratio must stay within 3:1, and total pixel count must fall between roughly 655,000 and 8,294,000. Anything above 2560×1440 is treated as experimental. Pixapi maps outputs to 1K, 2K, or 4K billing tiers based on the longest edge; passing size=auto defaults to 1K.
Real API Pricing and Billing Traps: Low-Cost Dev, Scalable Production
1 credit equals $0.01. Flare, Sunburst, and legacy GPT Image 2 share the exact same pricing ladder:
| Resolution Tier | Max Long Edge | low Tier | medium Tier | high / auto Tier |
|---|---|---|---|---|
| 1K Standard | ≤ 1536px | 1 credit ($0.01) | 4 credits ($0.04) | 14 credits ($0.14) |
| 2K HD | ≤ 2048px | 2 credits ($0.02) | 17 credits ($0.17) | 67 credits ($0.67) |
| 4K UHD | ≤ 3840px | 4 credits ($0.04) | 34 credits ($0.34) | 133 credits ($1.33) |
Cost-Control Traps to Avoid:
- The Default Quality Trap: If your API request omits the
qualityfield, the system defaults toauto, which bills at thehightier (14 credits min). During early development and automated testing, always pass"quality": "low"(1 credit / $0.01) to slash burn rates by over 90%. - Legacy Deprecation Deadlines: OpenAI will shut down
gpt-image-1on October 23, 2026, andgpt-image-1.5on December 1, 2026. Upgrade your pipelines to GPT Image 2 or 2.5 promptly, and remember to drop deprecated parameters likeinput_fidelity. - For volume packages and credit refills, check the pricing page.
6-Point Pre-Launch QA Checklist
Run through this checklist before routing production traffic:
- Typography Verification: Is text spelled accurately, rendered exactly once, and free of garbled fragments or stray watermarks?
- Subject Geometry: Did product proportions, brand geometry, and key markings survive without distortion?
- Boundary Freeze: Did edits strictly stay within target regions? Did fingers, shadows, or background scenery drift?
- Authentic Transparency: Does the exported PNG have a true alpha channel rather than painted gray-and-white checkerboards?
- Quality Parameter Lock: Did your dev/test scripts explicitly declare
"quality": "low"to avoid accidental billing spikes? - Fallback Switch: Does your production deployment retain a configuration toggle to instantly fall back to
gpt-image-2?
A good prompt is not a lucky draw—it is an unambiguous specification. Define clean acceptance criteria and compare Flare and Sunburst side-by-side on Pixapi to ship resilient image generation pipelines.
Try a few prompts now in the GPT Image 2.5 Generator, or grab an API Key from the Quick Start Guide.
Related Guides and Resources
- Comparison: GPT Image 2 vs Nano Banana: Developer Image API Benchmark
- Google Stack: Gemini 3 Pro Image API Guide and Pricing Breakdown
- Video Models: Seedance API Pricing Matrix and Cost Estimator
- Platform Rates: Pixapi Credit Pricing & Subscription Packages
Frequently asked questions
Flare vs Sunburst: how should developers choose?
Do not guess on vibes. Flare is the speed-first lightweight model matching GPT Image 2 quality, ideal for multi-SKU variants, bulk generation, and fast drafts. Sunburst is the heavy-duty foundation model built for sharp typography, intricate infographics, realistic portraits, and surgical inpainting. On Pixapi they share identical API endpoints and pricing matrices—test them with the same prompt suite and judge by cost per accepted image and latency.
How much does GPT Image 2.5 API cost on Pixapi?
API pricing strictly mirrors GPT Image 2: at 1K resolution, low tier costs 1 credit ($0.01) while high/auto costs 14 credits ($0.14). 2K high is 67 credits and 4K high is 133 credits. The interactive web Lab at /gpt-image-2-5-image-generator runs at a flat 2 credits per generation, perfect for locking down prompt specs before wiring them into backend code.
Why do local edits drift even with detailed prompt instructions?
A detailed prompt improves model obedience, but cannot guarantee pixel-identical preservation. When you ask to change a jacket, the model often rewrites the face, hair, or lighting. Always explicitly list a "freeze list" in your constraints. If your workflow requires 100% pixel lock on specific areas, composite the newly generated patch back onto the original frame using traditional masks rather than expecting text prompts to act as a flawless stencil.
When will gpt-image-1 and 1.5 shut down? How to migrate?
OpenAI has officially scheduled deprecation: 1.0 shuts down on October 23, 2026, and 1.5 shuts down on December 1, 2026. Migrate to gpt-image-2 first to verify pipeline stability, then evaluate 2.5. On Pixapi, switching is as simple as updating the model string in your JSON payload and dropping deprecated input_fidelity parameters.